The 3 Classes of Levers
Understanding how lever systems work in the human body is fundamental to kinesiology!
What is a Lever?
Let's talk about levers and how we use these levers in everyday life and inside our bodies to produce movement, increase force, and make directional changes. Levers are one of the simplest forms of a machine. A lever is a simple machine that allows you to gain a mechanical advantage in moving an object or in applying a force to an object.
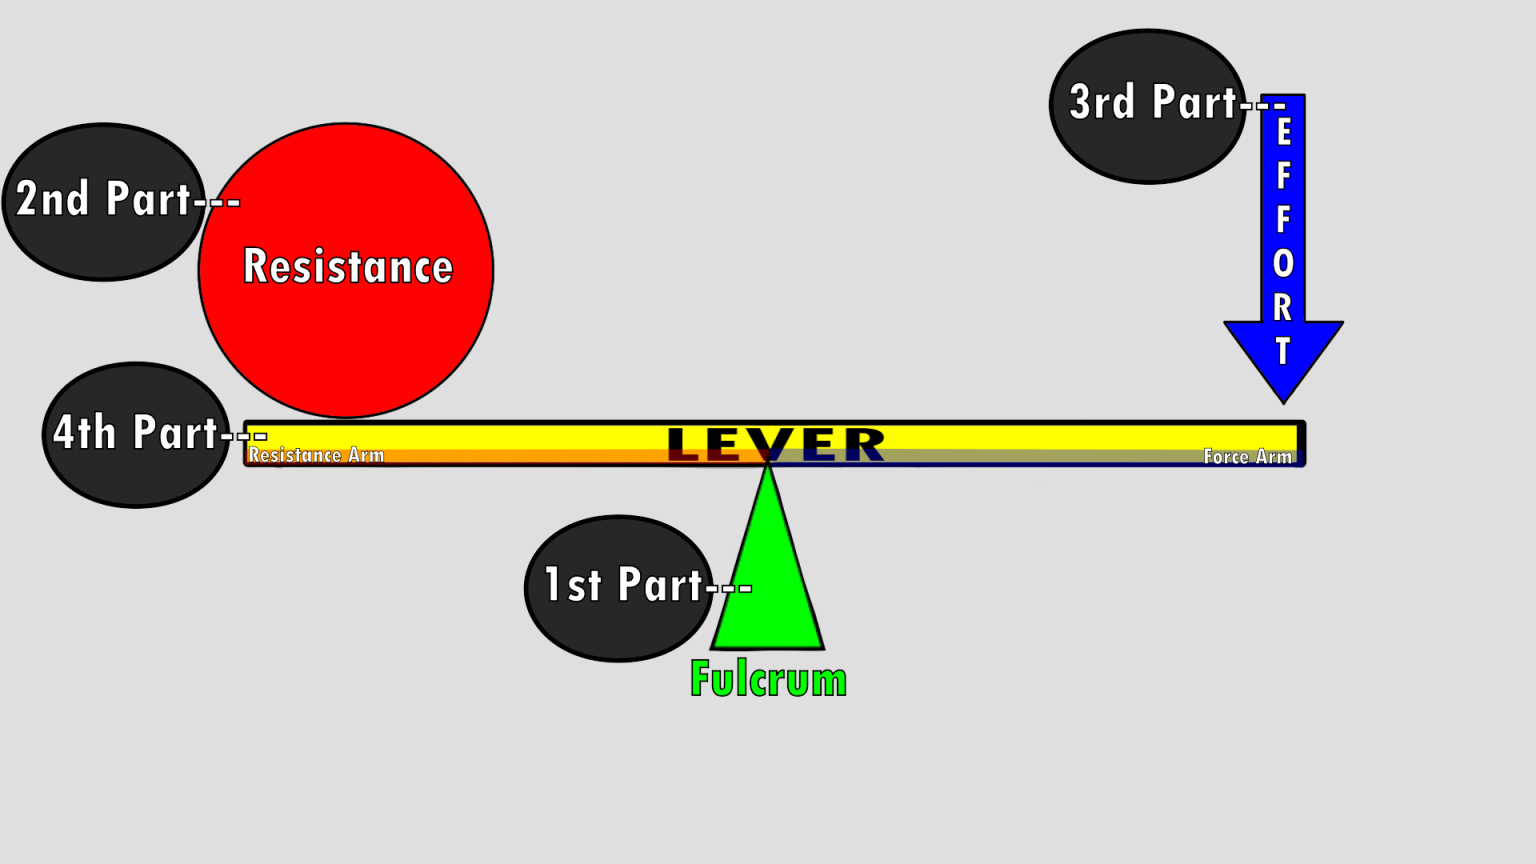
A lever is a simple machine that consists of 4 parts:
- 1The Fulcrum — known as the pivot point, axis, or balance point
- 2The Resistance — or load
- 3The Effort Force
- 4The Lever Arm — divided into the Force Arm and Resistance Arm
Mechanical Advantage Formula
The mechanical advantage is determined by dividing the force arm by the resistance arm:
Equilibrium is achieved when: Effort × Force Arm = Resistance × Resistance Arm
Watch the Video Lesson
Fulcrum in the Middle
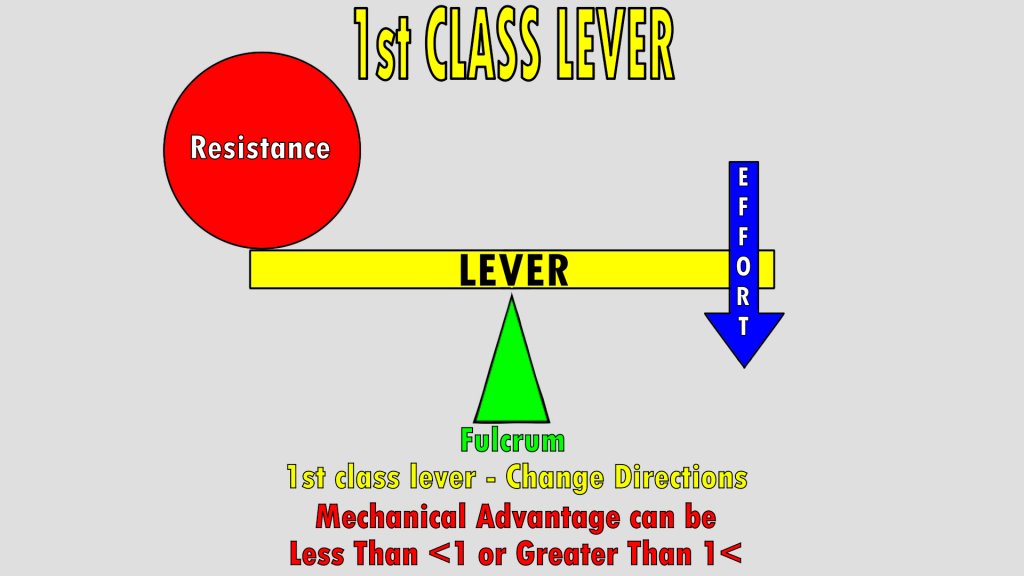
The first class lever is set up with the Fulcrum in the middle with the Effort and Resistance on the sides.
Function
Change Directions
Mechanical Advantage
Can be <1 or >1
Real World Example: The Seesaw
A comparable real world item would be the seesaw. The Fulcrum is in the middle, with each person acting as the resistance or effort force depending on which one is changing direction.
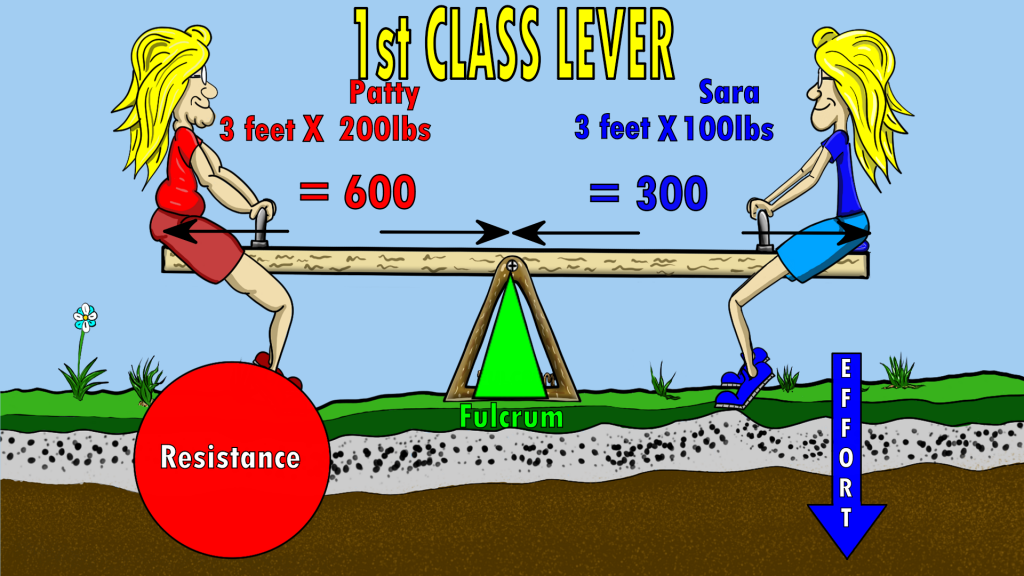
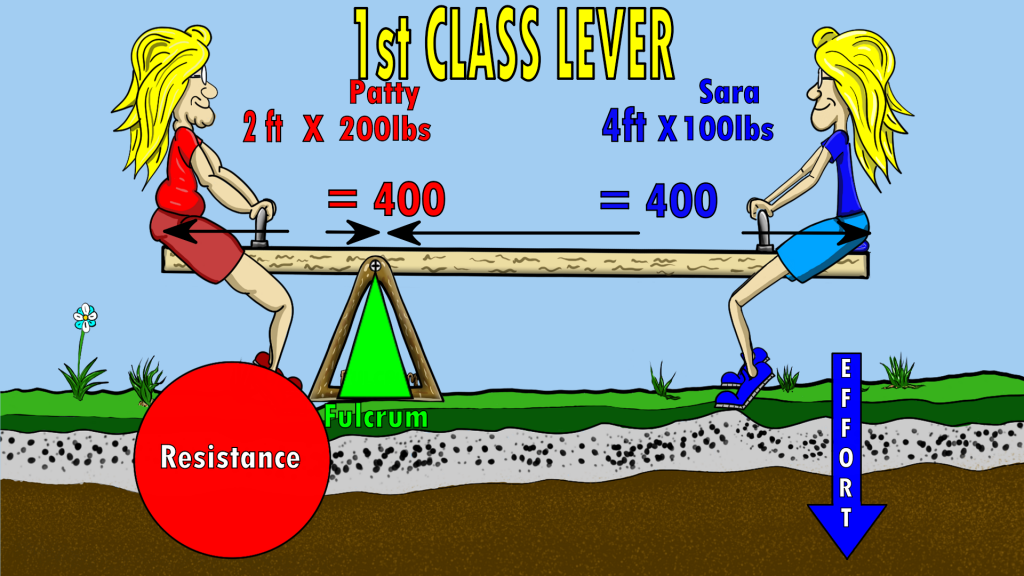
For example, we have Patty at 200lbs and Sara at 100lbs. In order for Sara @ 100lbs to move Patty @ 200lbs, Sara would have to increase the mechanical advantage >1 — at least 2 times the distance from the fulcrum.
Resistance in the Middle
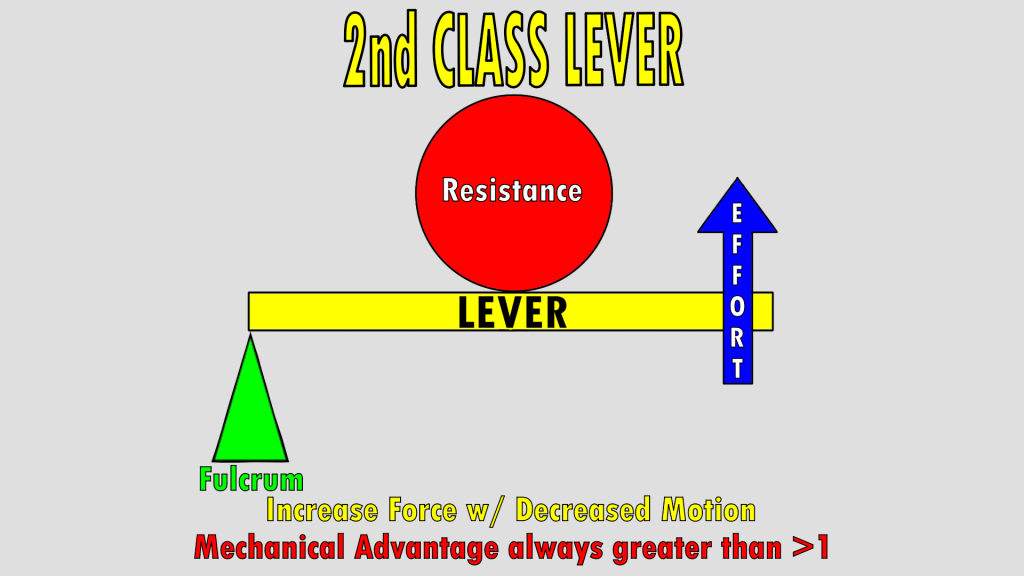
The 2nd class lever is set up with the Resistance in the middle of the effort force and the fulcrum.
Function
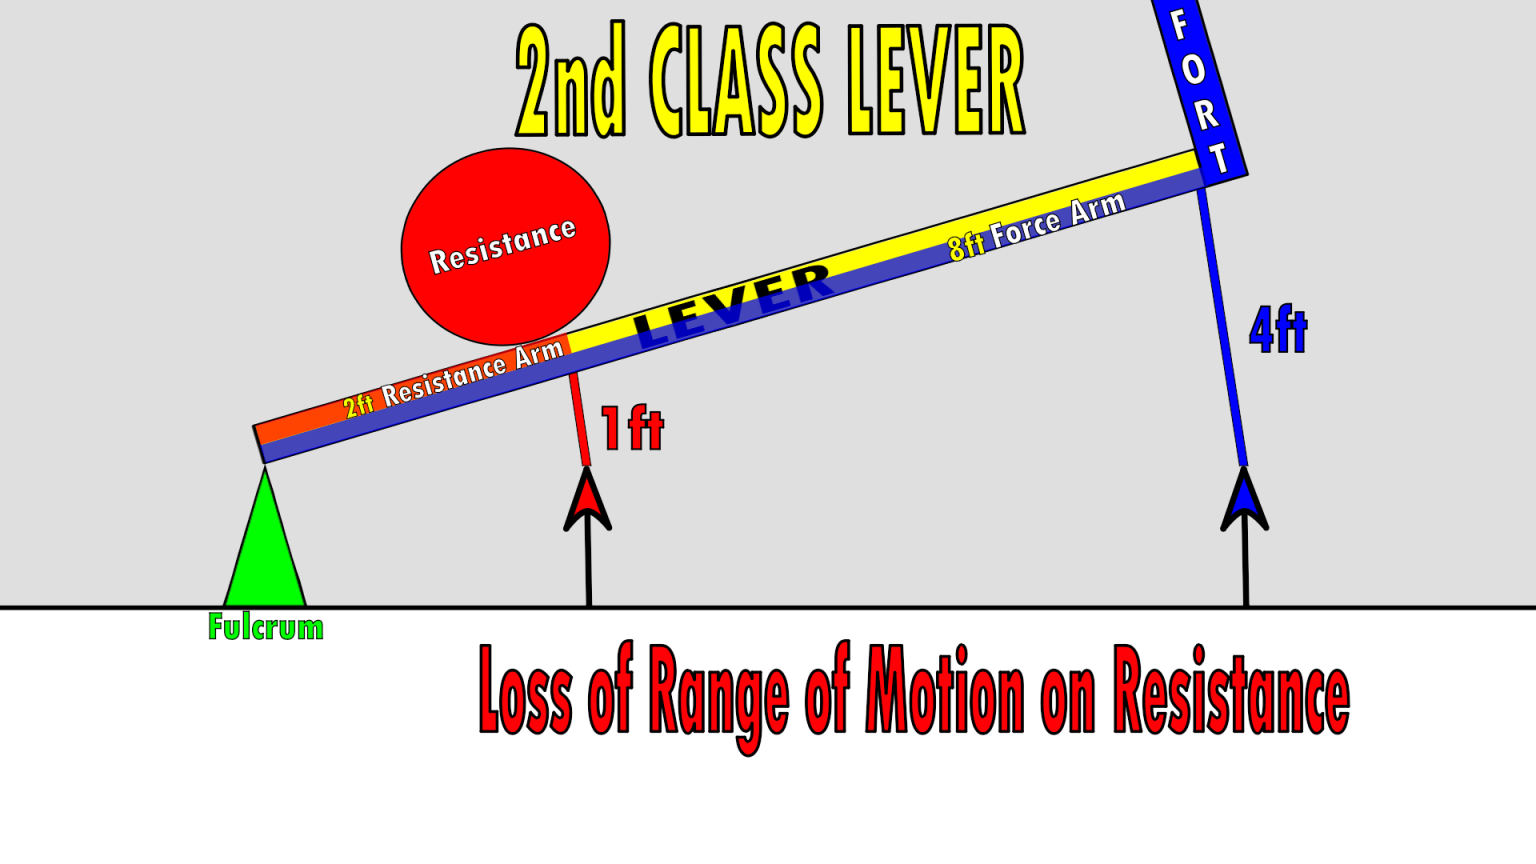
Increase Force (ROM sacrificed)
Mechanical Advantage
Always >1
Real World Example: The Wheelbarrow
The common real world item that uses this lever would be a wheelbarrow. The wheel is acting as the fulcrum, with the rock being the resistance in the middle, and the effort force would be the human force.
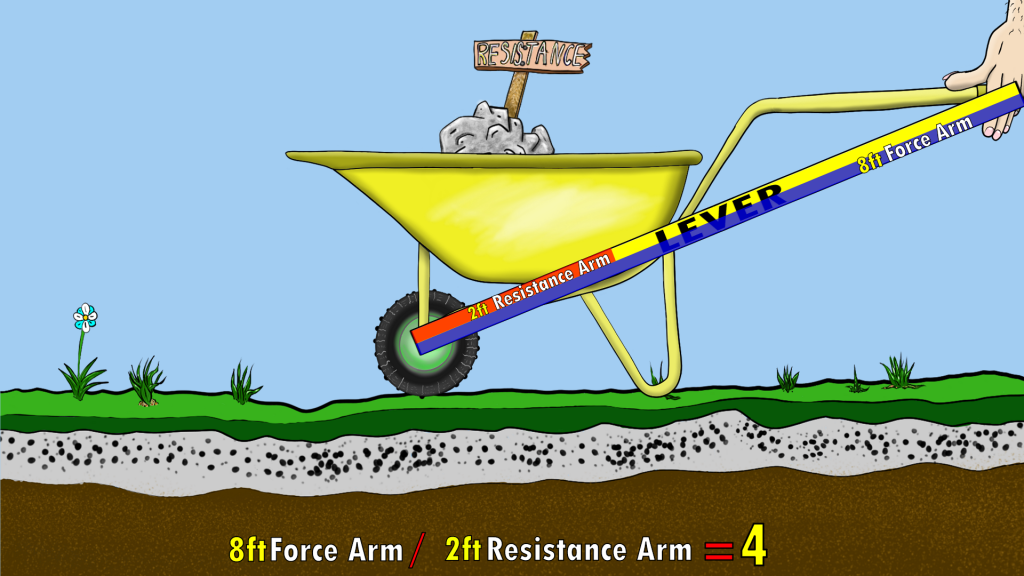
Imagine this rock weighed 100lbs, and the force arm is twice as long as the resistance arm — the 100lbs would feel like 50lbs. If the force arm was 4× as long, the 100lbs would feel like 25lbs! However, the longer the force arm, the less ROM you will get.
Effort in the Middle
The final lever is the 3rd class lever. The Effort is located in the middle of the resistance and the fulcrum.
Function
Gain Distance/Speed
Mechanical Advantage
Always <1
Real World Example: Hotdog Tongs
The common real world item would be hotdog tongs. The fulcrum would be where the tongs connect, the effort is applied to the center of the tongs, with the hotdog being the resistance.
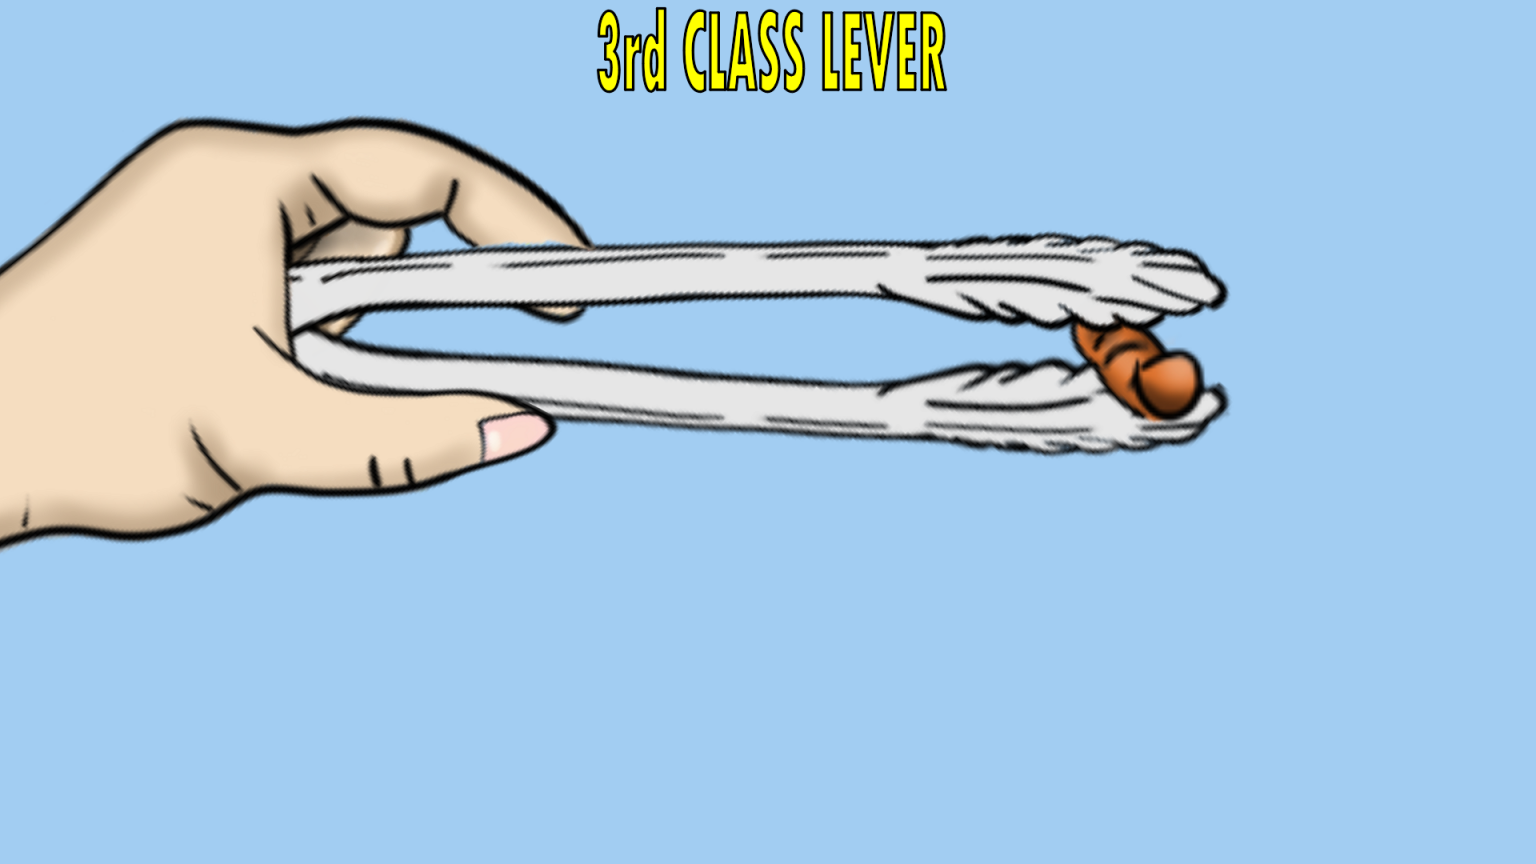
💡 This is the most common lever used in the human body!
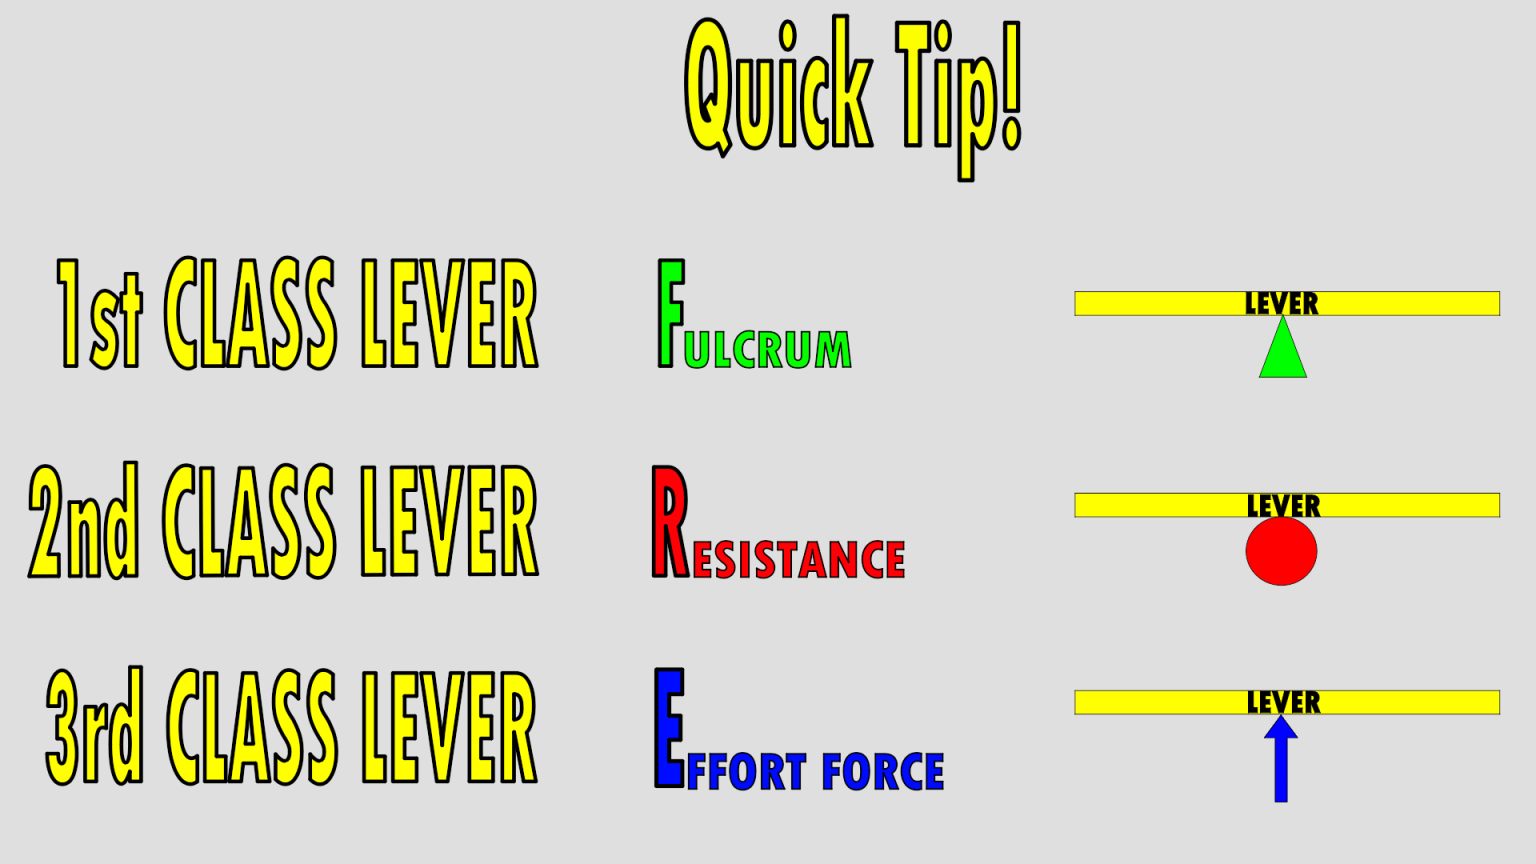
Study Tip: Remember "FRE"
A good way to remember which lever is which is the word FREE, but with one E. So spell it F-R-E:
Levers in the Human Body
Quick Reference Summary
| Lever Class | Middle Component | Function | Mech. Advantage | Example |
|---|---|---|---|---|
| 1st Class | Fulcrum | Change Direction | <1 or >1 | Seesaw, Head/Spine |
| 2nd Class | Resistance | Increase Force | >1 (always) | Wheelbarrow, Heel Raise |
| 3rd Class | Effort | Gain Distance | <1 (always) | Tongs, Elbow Joint |